Master the Foundation: The Ultimate Comprehensive Guide to Slip Knot Crochet for Absolute Beginners
Master the Foundation: How to Make a Slip Knot Crochet…
Master the Foundation: How to Make a Slip Knot Crochet for Beginners
If you have ever stared at a tangled ball of yarn and wondered how magic turns a simple string into stunning wearable art, you are definitely not alone. Every single crochet masterpiece—whether it is a delicate set of handmade floral blooms, a cozy winter blanket, or a fitted garment—begins with one absolute and essential foundation: learning how to make a slip knot crochet. If you have ever felt tripped up right at the starting line, take a deep breath. Mastering a slip knot crochet is a rite of passage for every maker, and once this first hurdle clicks into place, an entire world of creative possibilities opens up right before your eyes. Let’s walk through everything you need to know, from step-by-step instructions and visual alignment to expert tension tips that will get your hook moving smoothly.
Why the Slip Knot is the Heart of Every Project
Before diving into how to do a slip knot crochet, it takes only a moment to appreciate why this specific knot is so vital to your craft. Unlike a permanent knot that locks tightly and stays put, a slip knot is ingeniously designed to tighten or loosen smoothly around the shank of your crochet hook. It acts as your primary anchor, holding your working yarn secure while giving you the flexibility to adjust your tension as you create your initial chain stitches or foundation rings.
Think of the slip knot as the handshake between you and your project. If it is too loose, your yarn will flop around uncontrolled; if it is too tight, you will fight tooth and nail just to slide your hook through. Striking that perfect balance is the true secret to a frustration-free start.
Step-by-Step: How to Do Slip Knot Crochet Like a Pro
Grab your favorite ball of yarn and a comfortable hook, and let’s walk through the exact formation process step by step, just like you would see in a professional studio guide:
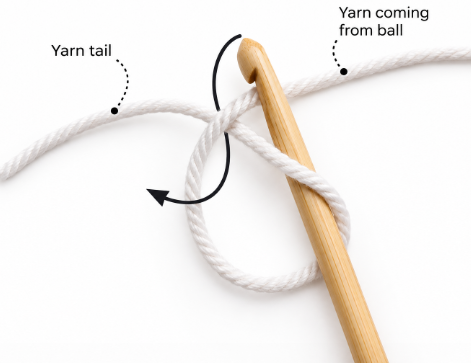
Form the Initial Circle: To make the first loop (known as the slip knot) on your needle or hook, begin by crossing the yarn coming from the ball over the yarn end (often called the yarn tail) to form a neat circle of yarn.
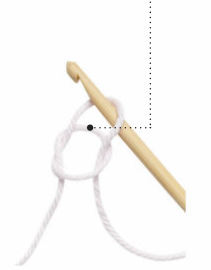
Insert Your Hook: Gently insert the tip of your crochet hook right through the center of that circular opening.
Grab the Working Yarn: Use the hook’s throat to catch the ball end of the yarn (the working yarn) and pull it back through the center of the circle.
Form the Open Knot: This pulling action naturally creates a fresh loop resting on your hook and a loose, open knot positioned directly below it.
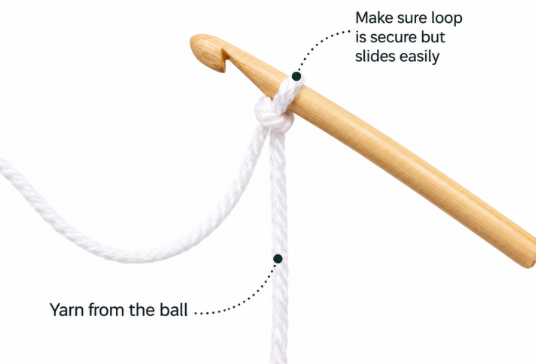
Secure and Tighten: Pull both ends of the yarn firmly to tighten the knot and adjust the loop snugly around the shank of your hook.
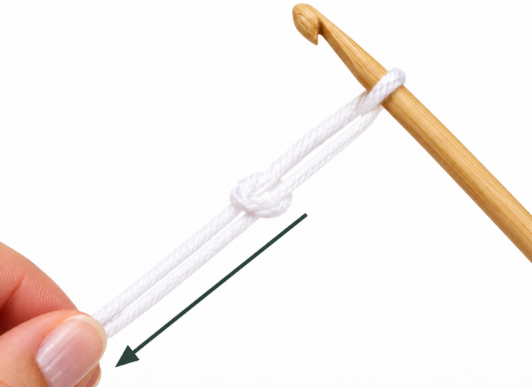
Check Your Tension: Make sure your completed crochet slip knot is tight enough on the hook that it won’t accidentally slip off during your work, but loose enough that you can easily slide it along the hook’s shank. The loop should feel secure yet slide effortlessly!
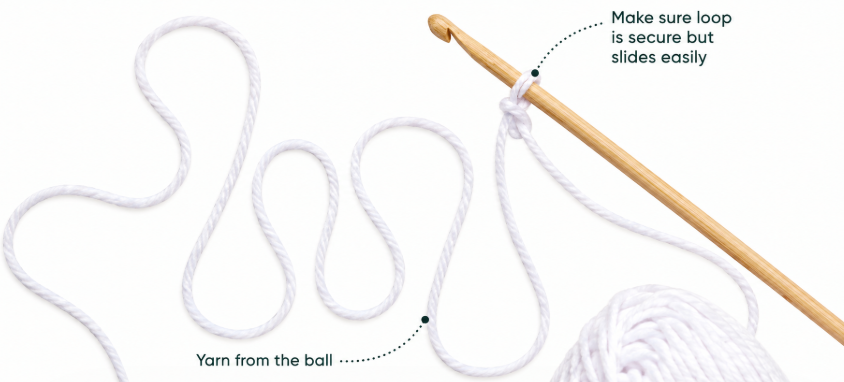
Mind Your Tail: Always leave a yarn tail on your slip knot that is at least 6 inches long. This ensures it can be easily threaded onto a blunt-ended yarn needle and darned securely later on when weaving in your ends.
Expanding Your Skills: From Your First Loop to Beautiful Projects
Once you have mastered how to do slip knot crochet, you are ready to expand your repertoire and test your newfound coordination. Many beginners wonder where to go next once they have conquered their first chain. The answer lies in small, rewarding projects that build confidence without overwhelming you with complex garment sizing or difficult shaping.
For instance, learning how to make simple geometric motifs or flat shapes helps you understand how yarn behaves under different tension settings. If you are looking for a project that delivers instant gratification, working on small decorative items is a fantastic milestone.
Putting It All Into Practice: Create Your First Floral Masterpiece
There is nothing quite like the satisfaction of finishing a project in a single sitting. If you want to put your fresh crochet slip knot skills to the immediate test, dive into our step-by-step guide on creating stunning crochet flowers and building your first handmade bouquet.
Working on small floral motifs teaches you how to transition from a basic foundation ring into rich petals, all while practicing the consistent tension you established with your very first slip knot.
What was your biggest hurdle when you first picked up a crochet hook? Whether you struggled with your initial tension or figuring out how to hold the yarn, drop a comment below—I would love to help you troubleshoot your stitches and cheer you on as you grow your crafting journey!