ILOVE SOCKS: Advanced Heart-Pattern Knitted Socks
About the I LOVE SOCKS Free Socks Knitting Pattern Following…
About the I LOVE SOCKS Free Socks Knitting Pattern
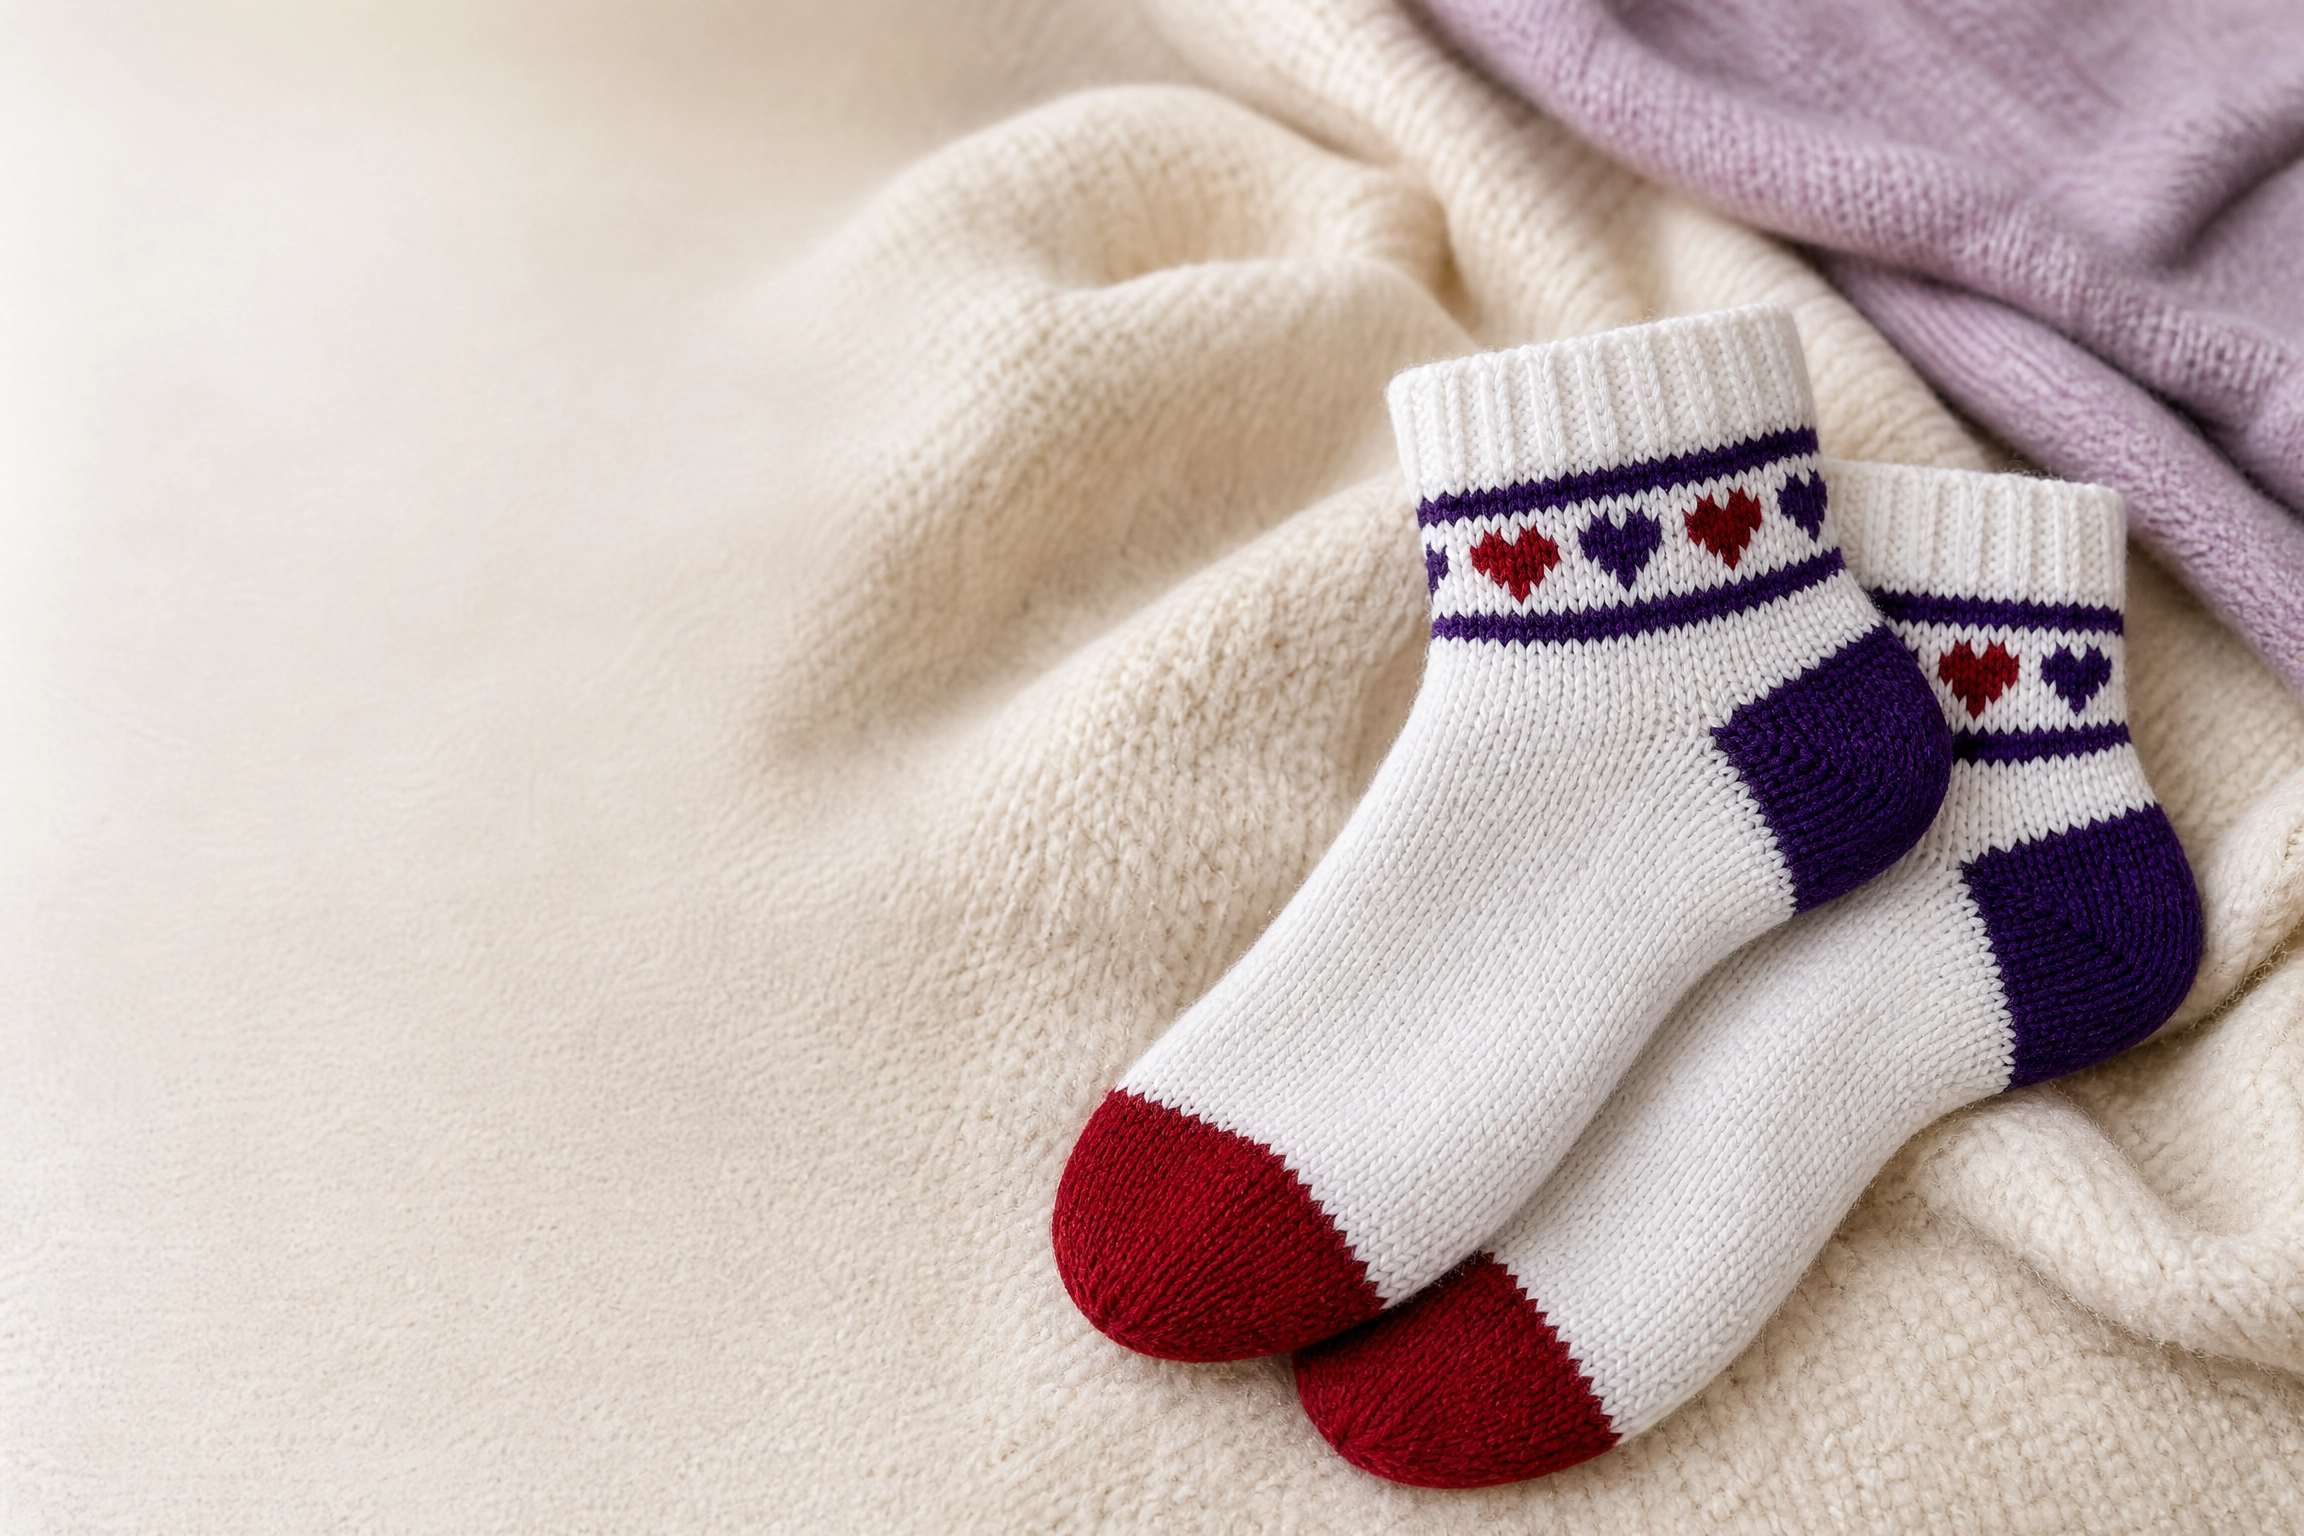
Following this free socks knitting pattern allows you to create something wonderfully personal by hand. There is something wonderfully personal about knitting a pair of socks by hand. They are practical, warm and comfortable, but they also carry the time, patience and creativity of the person who made them. The ILOVE SOCKS pattern adds an especially charming detail: a heart motif worked into a classic pair of knitted socks.
This is an advanced pattern, especially because it requires double-pointed needles, colour changes, heel shaping and toe finishing. However, each section becomes much easier when it is approached one step at a time.
Is This a Knitting or Crochet Pattern?
Although many people search online for crochet patterns, crochet ideas, or even crochet patterns for beginners, the I LOVE SOCKS design is a knitting pattern rather than a crochet pattern.
The use of double-pointed needles, knit and purl stitches, K2tog, SSK, a heel flap and Kitchener stitch clearly identifies this as a knitted sock pattern. If you are specifically looking for free crochet patterns or crochet sock patterns, you will need a different construction method and a different set of instructions.
Some search phrases, including “Informational crochet sockets” and “crochet socket patterns,” may refer to people looking for information about crochet socks. This article focuses specifically on knitted socks with a heart motif.
Materials You Will Need
If you want to create this project using the ilove socks knitting pattern, here are the materials you will need:
Yarn
-
Main colour (MC): 2 balls of Debbie Bliss Merino DK, 100% merino wool, 50 g / 110 m per ball, colour 100 White
-
Colour A: 1 ball of Debbie Bliss Merino DK, colour 608 Purple
-
Colour B: 1 ball of Debbie Bliss Merino DK, colour 700 Red
You will need a set of five US 3, or 3.25 mm, double-pointed needles to complete this free socks knitting pattern.
Gauge
The gauge is 26 stitches and 34 rows to 4 inches in stocking stitch on US 3, or 3.25 mm, needles.
Size and Fit
This pattern is designed to fit women’s shoe sizes 6–9.
Skill Level
Advanced.
Before You Start
Before casting on this free socks knitting pattern, take a few minutes to check your gauge. Socks need to fit comfortably, and even a small difference in tension can affect the final size. If your swatch is too loose, try smaller needles. If it is too tight, move up to a larger needle size.
It is also helpful to organise your yarn before beginning. Keep the white, purple and red yarns separate, and make sure you have enough room to work comfortably with four needles holding stitches while the fifth needle is used for knitting.
When joining the stitches in the round, check carefully that they are not twisted. A twisted cast-on edge is difficult to correct later, so this small step is worth taking slowly.
ILOVE SOCKS Knitting Pattern
Cuff
Make Two sock
With the main colour, loosely cast on 48 stitches. Divide the stitches evenly between four needles, being careful not to twist the stitches.
Join to work in the round and knit in K2, P2 ribbing for 1½ inches, or 4 cm.
On the next round, knit all stitches. Then knit the heart and stripes chart once. After completing the chart, knit five rounds in Colour A.
The cuff sets the tone for the entire sock. The ribbing gives the top of the sock enough stretch to sit comfortably around the leg, while the colourwork introduces the heart motif that makes this design so distinctive.
Heel Flap
Work over 24 stitches with colour A as follows:
Row 1: Slip 1 stitch knitwise, knit 1 stitch; repeat this sequence 12 times.
Row 2: Slip 1 stitch, purl 23 stitches.
Repeat Rows 1 and 2 until the heel flap measures 2½ inches, or 6.5 cm, ending with Row 2.
The heel flap is one of the most recognisable parts of a traditional knitted sock. The slipped stitches create a firm, textured fabric that helps the heel withstand regular wear.
Heel Turn
Continue shaping the heel as follows:
Next row: Slip 1 stitch, knit 13 stitches, slip the next stitch knitwise, knit 1 stitch, pass the slipped stitch over, knit 1 stitch, then turn.
Next row: Slip 1 stitch, purl 5 stitches, purl the next 2 stitches together, purl 1 stitch, then turn.
Next row: Slip 1 stitch, knit 6 stitches, slip the next stitch knitwise, knit 1 stitch, pass the slipped stitch over, knit 1 stitch, then turn.
Next row: Slip 1 stitch, purl 7 stitches, purl the next 2 stitches together, purl 1 stitch, then turn.
Continue in this manner, increasing the number of stitches worked by one each time, until all the side stitches have been used. You should have 14 stitches remaining.
On the next row, knit 7 stitches, switch to Colour A and knit 7 stitches.
The heel turn can look complicated when you first read it, but the repeated rhythm makes it easier as you go. The turning point gradually creates the curved shape that allows the sock to fit around the back of the heel.
Gusset
Pick up 14 stitches along the side of the heel flap. Knit across the 24 stitches of the instep, then pick up 14 stitches along the other side of the heel flap.
Divide the heel stitches between Needle 1 and Needle 4.
Round 1: Knit.
Round 2, Needle 1: Knit to the last 3 stitches, knit 2 together, then knit 1.
Needles 2 and 3: Knit 12 stitches on each needle.
Needle 4: Knit 1, slip the next stitch knitwise, knit 1 stitch, pass the slipped stitch over, then knit the remaining stitches.
Repeat Rounds 1 and 2 until 48 stitches remain.
The gusset gradually reduces the extra stitches created when the heel flap is connected to the instep. Keep an eye on your stitch count during this section, as it is easy to lose track while working across several needles.
Foot
Work even until the foot measures approximately 2 inches, or 5 cm, shorter than the desired finished length of the sock in this free socks knitting pattern.Measuring the foot before beginning the toe is important. The toe shaping will add additional length, so stopping too late may result in a sock that is too long. For the best fit, measure from the back of the heel to the tip of the wearer’s toe.
Toe Shaping
Work the toe using colour B.
Round 1:
Needle 1: Knit to the last 3 stitches, knit 2 together, then knit 1.
Needle 2: Knit 1, slip the next stitch knitwise, knit 1 stitch, pass the slipped stitch over, then knit the remaining stitches.
Needle 3: Knit to the last 3 stitches, knit 2 together, then knit 1.
Needle 4: Knit 1, slip the next stitch knitwise, knit 1 stitch, pass the slipped stitch over, then knit the remaining stitches.
Round 2: Knit.
Repeat Rounds 1 and 2 until 20 stitches remain.
Cut the yarn, leaving a 12-inch, or 30.5 cm, tail for weaving.
Finishing
Close the toe using Kitchener stitch. Weave in all remaining ends securely.
Kitchener stitch creates a smooth, nearly invisible seam across the toe. It may take a little practice, but it is worth learning because it gives hand-knitted socks a polished and comfortable finish.
Helpful Tips for Knitting These Socks
Keep Your Tension Even
Colour changes and small needles can sometimes make your tension tighter than usual. Try to keep the yarn relaxed when changing colours, especially across the heart motif. The fabric should lie flat without pulling or puckering.
Use Stitch Markers if Needed
Stitch markers can help identify the beginning of the round and separate the instep from the heel stitches. This is particularly useful during gusset shaping.
Count Regularly
Sock patterns involve several decreases and changes in stitch placement. Counting your stitches at the end of each section can prevent small mistakes from becoming difficult problems later.
Do Not Rush the Heel
The heel flap and heel turn are often the sections that require the most attention. Read each row carefully and remember that the shaping becomes clearer once the three-dimensional form begins to appear.
Try the Sock on During the Process
If possible, try the sock on before beginning the toe. This gives you an opportunity to check the width and length before the final shaping is complete.
Frequently Asked Questions
Are knitted socks comfortable?
Yes. Following this free socks knitting pattern results in very comfortable socks when the yarn, gauge and measurements are suitable for the wearer. Merino wool is soft, warm and naturally breathable, making it a pleasant choice for handmade socks.
Which yarn is best for knitted socks?
Sock yarn should be comfortable against the skin and durable enough for regular use when following a free socks knitting pattern. This pattern uses Debbie Bliss Merino DK, made from 100% merino wool. Always consider the intended use of the socks and follow the recommended gauge.
Is this a crochet sock pattern?
No. The ILOVE SOCKS pattern is designed for knitting with five double-pointed needles. Crochet socks require a hook and use a different construction technique.
Is this pattern suitable for beginners?
The stated skill level is Advanced. A confident beginner who has already knitted in the round may be able to follow the pattern with additional support, but previous experience with heel flaps, decreases and Kitchener stitch is recommended.
What is the hardest part of knitting socks?
Many knitters find the heel turn and gusset the most challenging sections. These parts involve short rows, decreases and careful stitch placement. Once you understand how the shaping works, they become much less intimidating.
How long does it take to knit a pair of socks?
The time depends on your experience, knitting speed and the amount of attention required by the colourwork. Because this is an advanced pattern with several construction stages, it is best treated as a project to enjoy rather than one to finish in a single afternoon.
Why Make the ILOVE SOCKS Pattern?
Handmade socks are small projects with a surprisingly satisfying result. They give you the opportunity to practise important knitting techniques while creating something genuinely useful.
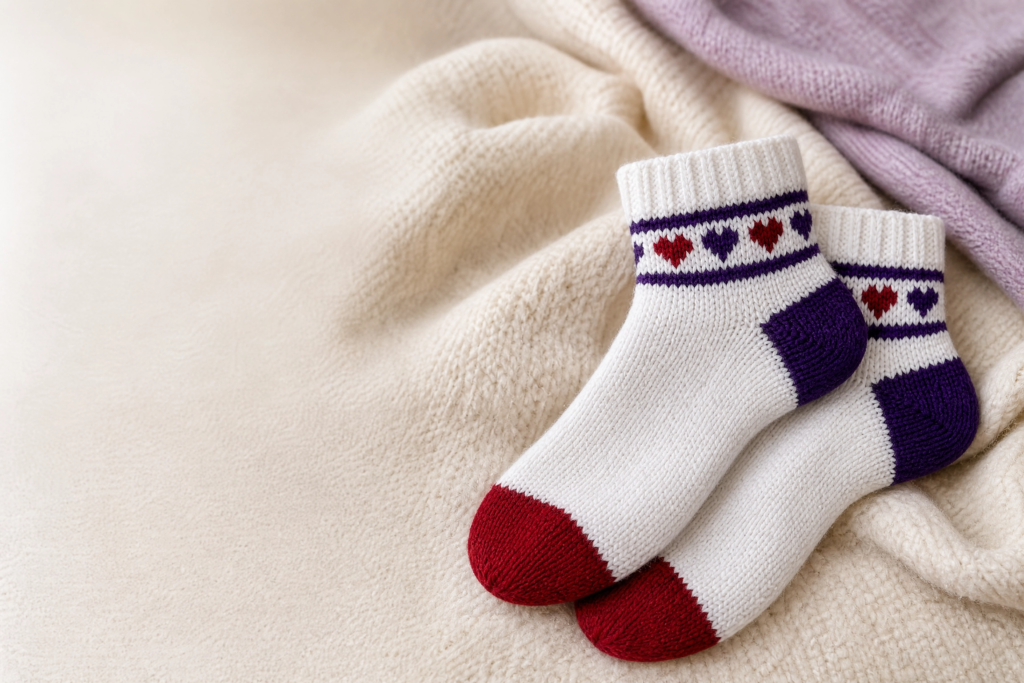
The ILOVE SOCKS design is especially appealing because the heart motif adds a personal touch without overwhelming the traditional structure of the sock. The white, purple and red colour combination creates a warm and expressive finish that can be worn throughout the colder months.
Whether you are making them for yourself or giving them to someone special, this free socks knitting pattern is a beautiful reminder that practical handmade objects can also be full of personality.
Final Thoughts
The ILOVE SOCKS pattern – free socks knitting pattern – is an advanced but rewarding knitting project. From the ribbed cuff to the heart motif, shaped heel and smooth Kitchener stitch toe, every stage contributes to a carefully constructed pair of socks.
The heel may require patience, and the colourwork deserves careful attention, but the finished result makes the effort worthwhile. With the right yarn, accurate gauge and a steady approach, you can create a pair of warm, meaningful socks that are as enjoyable to wear as they are to make.
Gather your yarn, prepare your double-pointed needles, and enjoy working through every step of this ilove socks knitting pattern.
Ready to Start Your Pair?
Save this pattern for your next knitting project, gather your white, purple and red merino yarn, and share your finished ILOVE SOCKS with fellow makers. If you enjoy handmade designs, explore more knitted sock patterns, crochet patterns, crochet ideas and free crochet patterns for your next creative project.